
Last year was unlike any other year I’ve ever had. I think the silence on this blog kind of reflects that. Trucking along in a quieter-than-usual but other wise normal year, and then June 17th comes and off the grid I go. That’s when we finished packing up everything we owned in NJ (everything that was left after weeks of purging, yard sales, and donations), left the house we’d owned for 10 years, 7 months, and 12 days, spent a week driving across the country to Washington, moved into a rental apartment, spent three months looking at houses/putting offers on houses/buying a house, and then moved into our farmhouse on the 28th of September. It’s on six acres of forested woodlands, it’s beautiful, and I’m so in love with it out here.
Tag: Quilts
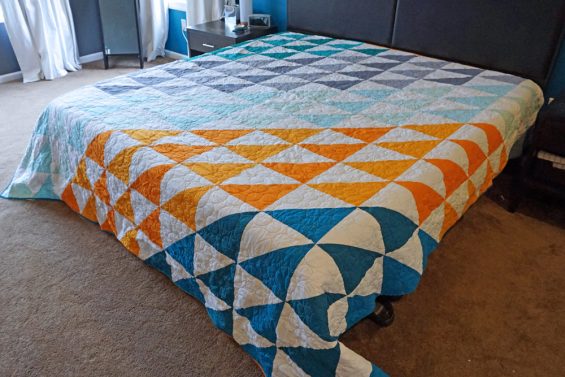
I started this quilt almost two years ago with a ton of sketches, and it is finally, finally finished. I don’t know why I’ve never posted photos of the progress on this quilt, only sketches. But I’ve worked on it, put it aside, finished the top, put it aside for months upon months before making the backing, and then putting it aside again before I finally got it quilted and bound. But now it’s done…just in time for us to move out of this house, and out of this bedroom that we specifically painted to coordinate with this quilt. It’s like the curse of the boyfriend sweater, but for bedrooms.
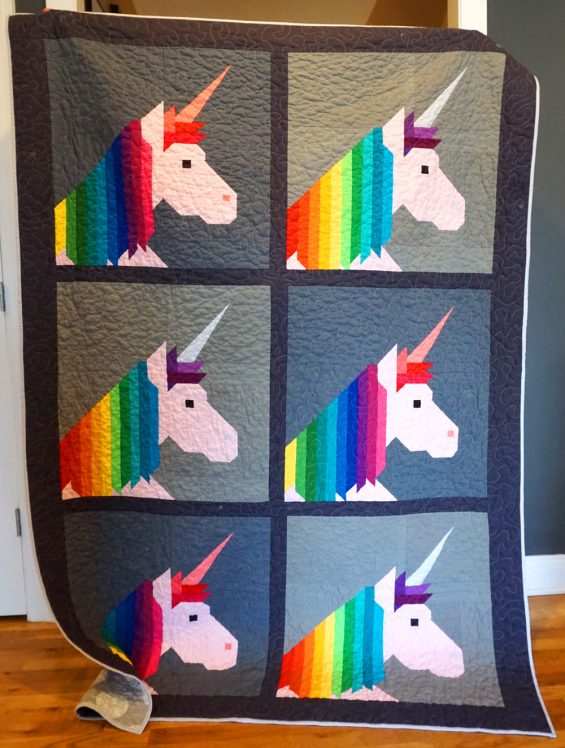
I made this quilt for H’s 6th birthday this week, I finished it last week just in time for her big day on Thursday. I used the Lisa the Unicorn pattern from Elizabeth Hartman, and it was phenomenal. Clear directions, and so much fun to make.
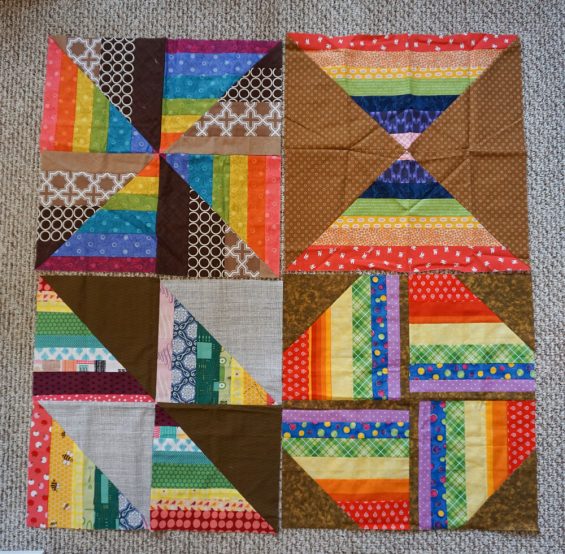
Other posts on this round robin: Our Quilt Block for the Kids Quilt Round Robin, Our Next Kids Quilt Round Robin Block, Our Last Kids Quilt Round Robin Block.
H got all of her blocks back from this summer quilting round robin back in September, and we love them. She’d asked for brown and rainbows, and that is what she got. We haven’t had a chance to sew this quilt together yet, but we will. She’s been less interested in sewing this fall, but she did just ask me the other day if we could make something, so I think we’ll pull these blocks out soon.
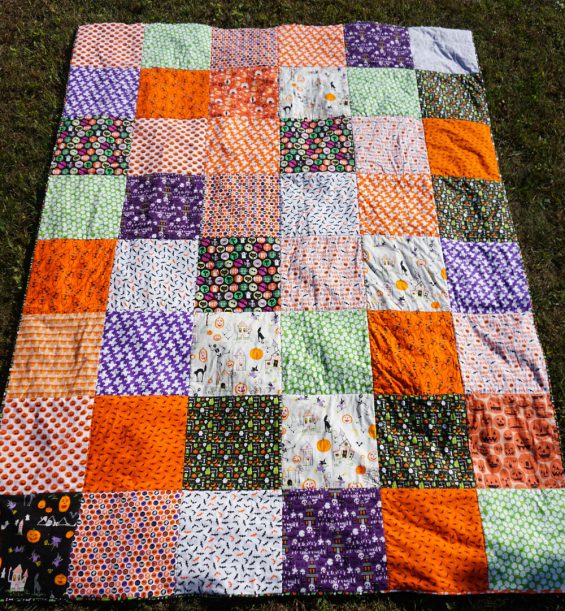
Other posts on this project: I’m Working on a Halloween Quilt.
Still haven’t finished her costume! But I did finish this Halloween quilt. Let’s be real here, I’ve cut out the paper pattern but have not cut any fabric or sewn a stitch yet. I’ve been under the weather the past couple of days and haven’t made any more progress, but I will. I am determined to get this costume done by next Saturday, for a costume birthday party for one of H’s classmates.