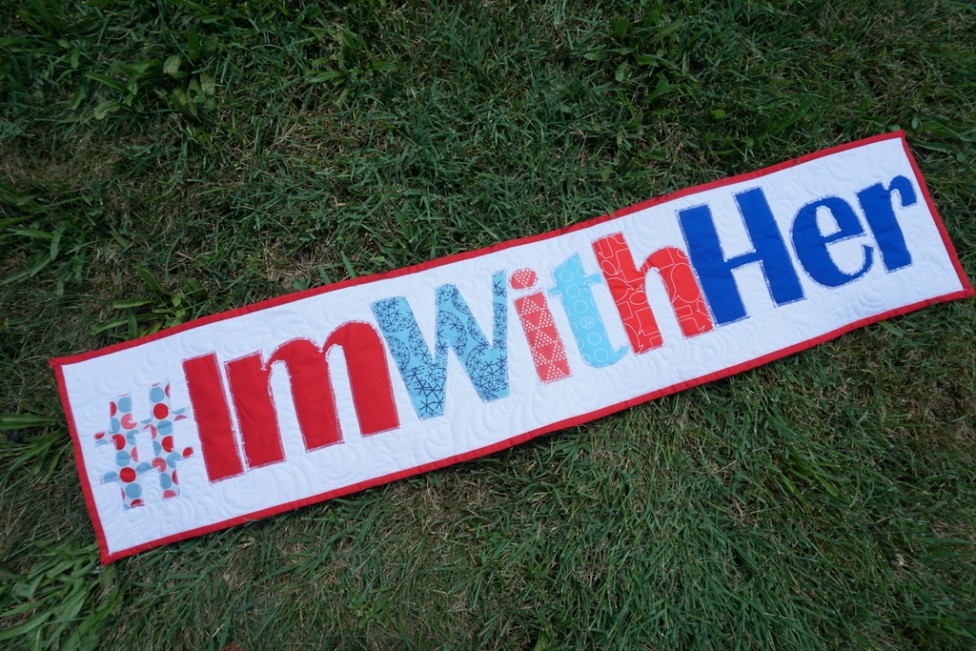
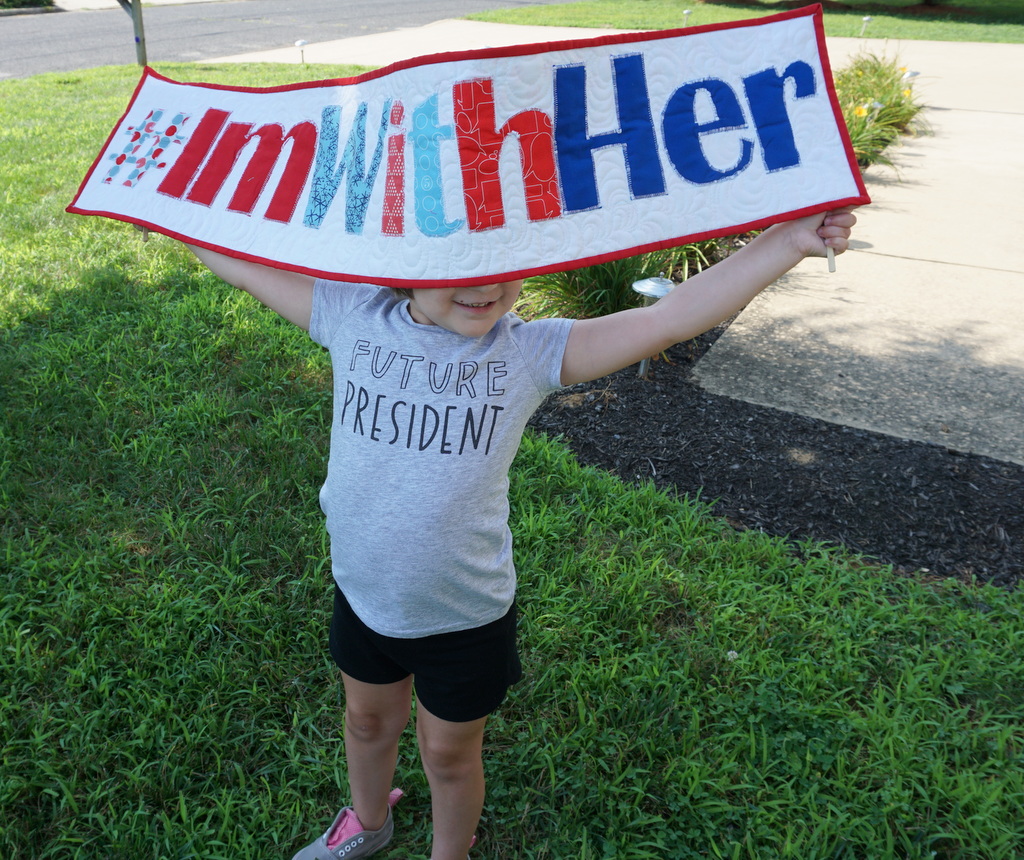
I’m kind of exhausted by politics this year, it must be said. But I made this banner last week during the DNC to celebrate HRC’s historic nomination for a major political party. I’m full of excitement and positivity about my kid’s future, and whatever happens in November (and my own personal politics, which are hard to ignore with a banner like this), representation matters.
I love this quote from Sally Ride:
Young girls need to see role models in whatever careers they may choose, just so they can picture themselves doing those jobs someday. You can’t be what you can’t see. –Sally Ride
It may not be Hillary, it may not be someone who aligns with my politics, but now more than ever it feels like a certainty that my daughter will see a female president in her lifetime. And possibly sooner rather than later. In her world, girls rule and can do anything, and it will just always have been that way for her. /endrant
So, if you want to make this banner, here’s what you’ll need:
1/2 yard of white background fabric
1/2 yard of red, white, and blue fabric for the background
1/2 yard of red for the letters and the binding
5 different red, white, and blue scraps that are about 6″ square
Fat quarter of royal blue fabric
1/2 yard of lightweight fusible interfacing
1/2 yard of batting (or scraps if you have them!)
Here’s the imwithher lettering I used for the banner. Print out and cut out the letters. Sort the letters and the fabrics you’d like to use for the banner. I used red for “Im,” blue for “Her,” and scraps for each remaining letter and the hashtag.
Line up your letters on your fabrics before cutting them, and cut a section of interface and fabric big enough for all the letters you’ll be cutting out of each color. Fuse the interfacing to the wrong side of the fabric using a damp cloth or towel (here’s a simple tutorial if you haven’t used interfacing for applique).
Once you have the interfacing ironed on to the back of each fabric color, pin the paper letters carefully to the front and cut out all of the letters.
From the 1/2 yard of white fabric, cut a strip that’s 9″ by the width of the fabric. Mark a line that’s 2″ from the bottom. Arrange the letters evenly on the white fabric, aligning the bottoms to the marked line and leaving very little space between them. Iron in place, then pin if you feel you need that extra stability. I only left about an inch to the left and the right of the letters and trimmed off the rest of the white fabric. I was nervous it was getting too wide for a kid to hold up.
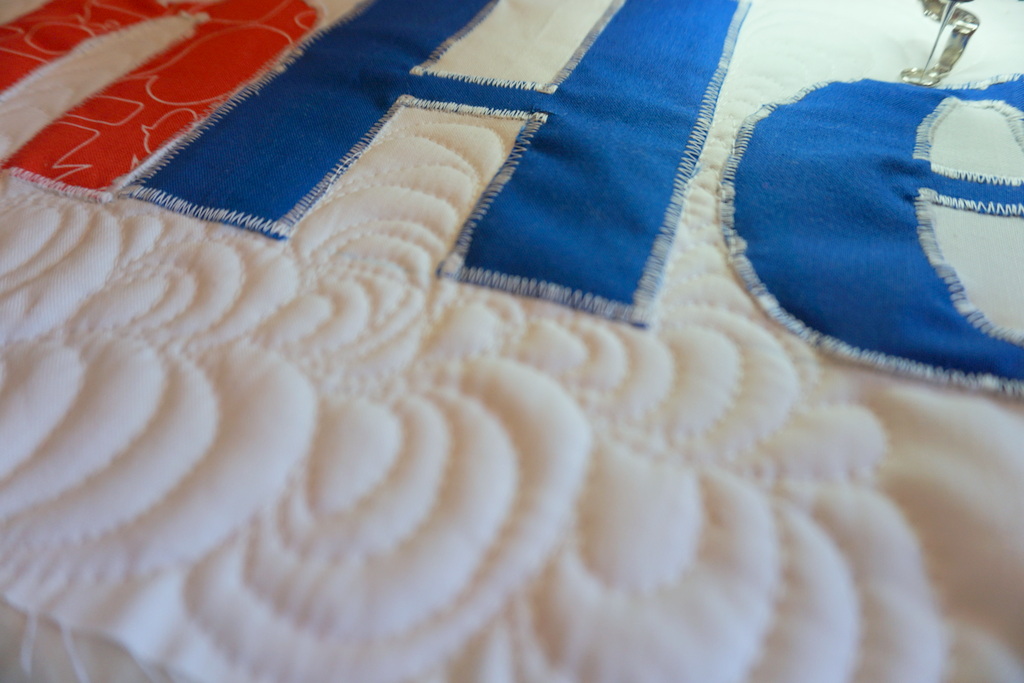
With the letters fused to the white fabric, zigzag stitch all along the raw edges to secure each letter in place. Cut the backing to be 2-3″ bigger than the quilt top. Sandwich and pin or baste the 3 layers together, and quilt close to and in between the appliquéd letters (but don’t quilt through the letters).
Trim the quilt. Now it’s on to the binding! Cut 3 strips of red fabric that are 2-1/4″ by the width of the fabric. Assemble the binding and sew it to the front of the quilt. Turn it over, pin it in place.
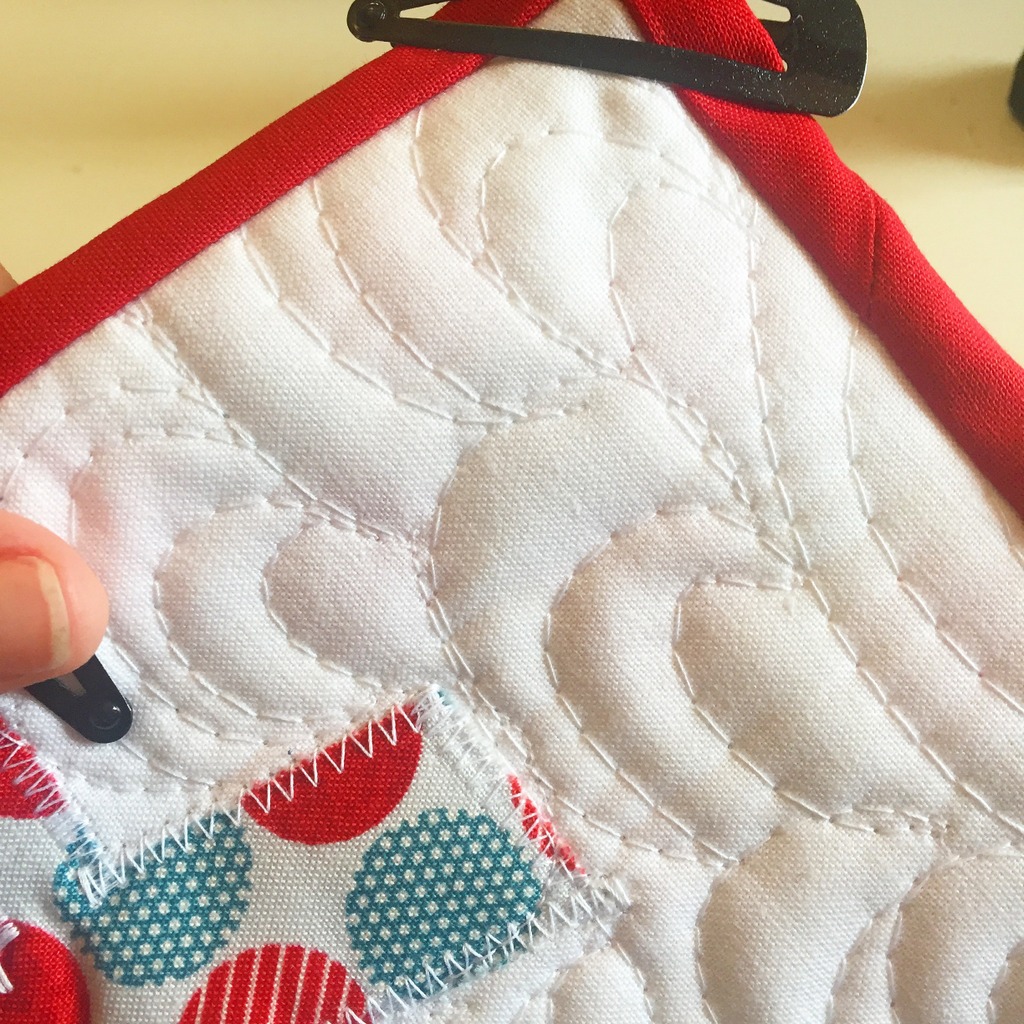
You can either hand stitch the back or machine stitch it (like I did because I was in a ridiculous hurry, but it’s messier). H had trouble holding the banner up on its own, so I actually went back, took out my back binding stitches on the top two corners, and added triangles so that she could put sticks into the corners to help hold it up. To make those I cut two 2.5″ squares and folded them in half, leaving the folded seam out for the sticks. (My stitching got so much messier when I redid it).
 Grab some chopsticks, or any sticks, and wave your banner.
Great post! I hope that H gets to read it someday perhaps using it in a school report or showing it to your grandchild. 🙂