
And it’s made my quilt sandwiching so much easier. Usually I spread all 3 layers of a quilt out on my bed, pull it tight, and pin it. I’ve tried spray basting, and maybe I’ll try it again someday. But I still prefer pins. And I love this method. It lets me just use my cutting table, I don’t even have to spread the whole quilt flat.
You’ll need:
- Painters tape
- 2 pencils (or chopsticks, just any smooth stick…you need to be able to feel the shape through your quilt layers)
- Lots of pins
- Clamps that fit the thickness of your table
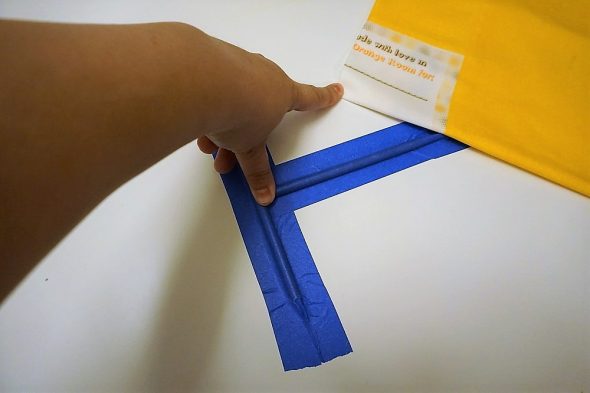
So, I’ve taped down 2 pencils to my cutting table, perpendicular to each other with a nice sharp right angle. I’ve actually put them off to one side of the table, not in the middle, so I can keep them taped down and away from my cutting mat when I need it. They’re almost off to the left edge. I made sure to secure that tape right up against the pencils, too, so I don’t get a tented shape. I want the pencils to butt up to each other properly.
From there, the idea is that you fold each layer of your quilt in half and then in half again, to get 4 perfect quarters, and iron that corner so it’s a nice, sharp crease. That marks the exact center of your backing (pictured above), your batting, and your quilt top.
Then, you lay out each layer on your table like a normal quilt sandwich, but the layers can overhang on the table. The whole quilt does not need to be flat at the same time. First you match that center crease from your backing to the center point of those two pencils (using your hands), and clamp the layer to your table (right side against the table). Then add the batting, using your fingers to again find the center pencil point and match it to the center point of your folded backing. Remove the clamps from the backing (carefully), and now clamp the backing and the batting to the table.
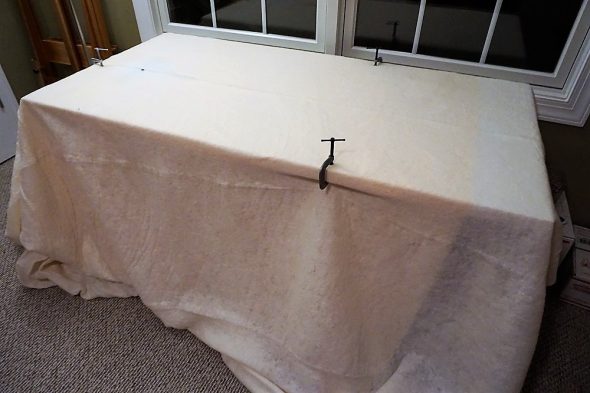
This is a big quilt, and you can see the end of the yellow backing through that batting above (I hadn’t trimmed it down yet). But it doesn’t have to be centered on the table, as long as it gets centered wherever you put your pencils. Mine are that discolored area over to the left, near that clamp on the table’s end.
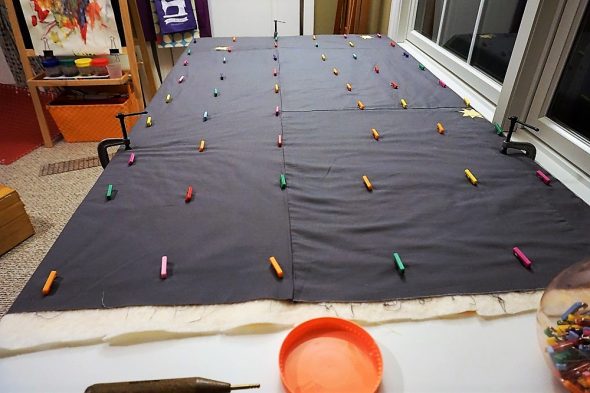
Then, lay out your quilt top the same way. And clamp it down again.
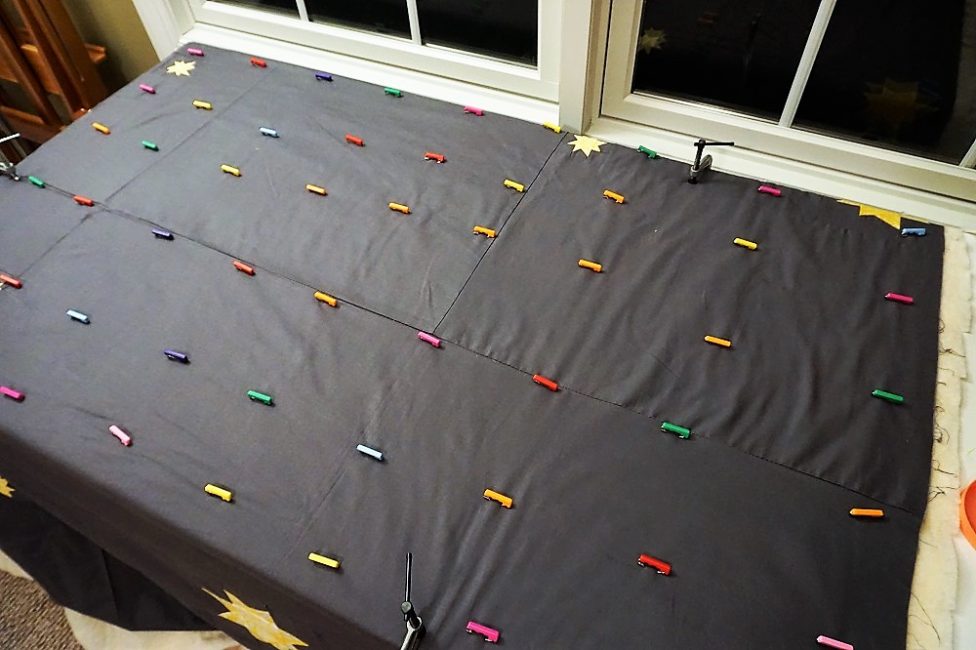
Now, you can pin the whole thing in sections. Use a lot of pins, move across the whole surface of the table, then when that section is pinned, you can move the quilt, smooth it out, clamp it down, and pin the next section. You only have to line up to the pencils for the center during that first pass. Then just smooth it out, move it around as you need to, clamp it, and pin it.
It took me a fraction of the time it usually does to pin, and I probably used 3x as many pins as I usually do. Which is nothing to brag about, I am a notoriously lazy pinner. Usually because I’m wrestling something on a soft bed, my bum knee does not like it when I work on the floor. This was a back saver, too. I could work at a higher surface to pin, and get it good and tidy. When I quilted this one, it was fantastic to work with.
That’s it! That’s my trick. My mom is a quilt genius, and this new basting move is the best.
Leave A Comment