
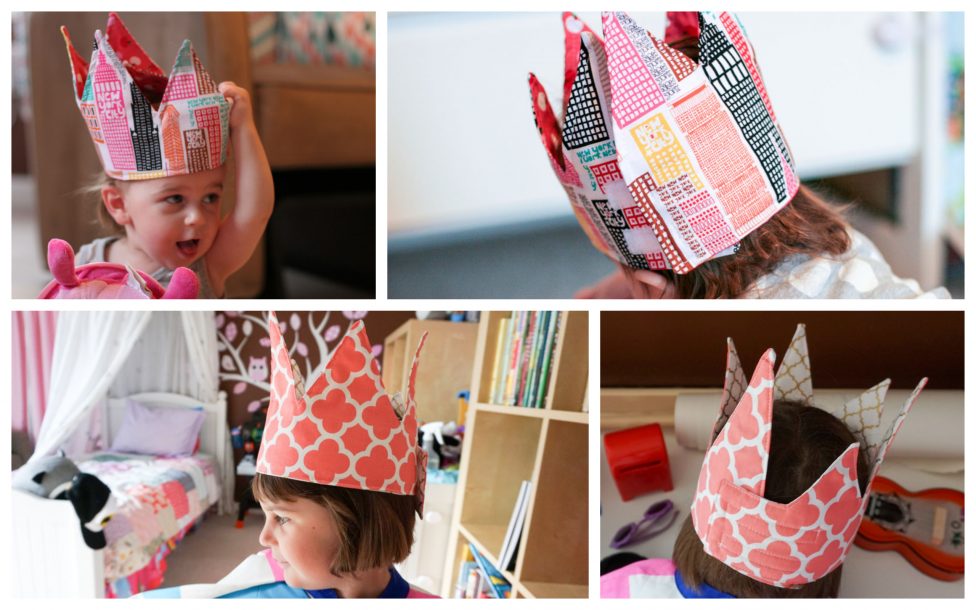
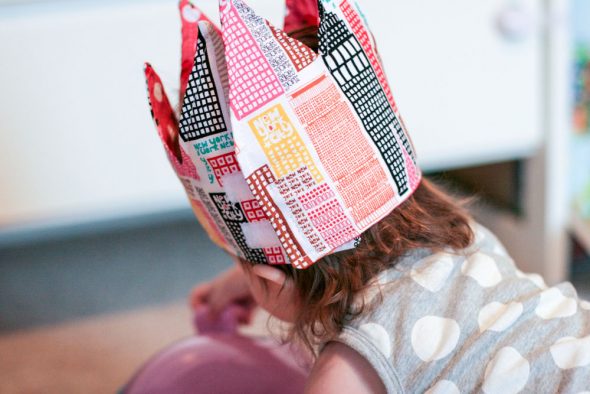
This one is an oldie but a goodie, a tutorial I did for GeekMom back in 2013. The photos don’t seem to work over there anymore, and since H outgrew that original crown a while ago, I figured I’d put up the tutorial here, too. With a few tweaks and new photos. I’m just now making her a brand-new one because we are obsessed with all things princess lately.
There are a lot of crown tutorials out there (I’ve linked the ones from the GeekMom post down at the bottom). But I love making crowns like this because they’re reversible, and I like to improvise this style with tall peaks because it reminds me of Max’s crown in Where the Wild Things Are. And that just makes me happy.
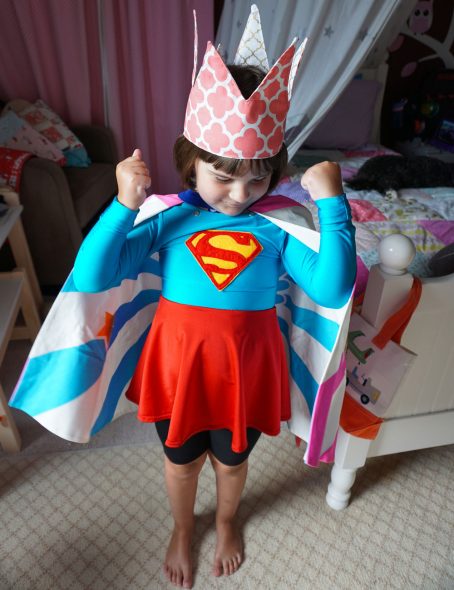
(It was superhero day at camp when we took these pictures, so this is her showing off her muscles and super strength).
So, this tutorial is pretty easy. I’ve made toddler versions and newborn baby versions, and they’re great. It takes less than an hour once you get the hang of it, and I’ve made them in as little as half an hour if I’m really paying attention.
You’ll need these supplies:
1/4 yard of fabric for the outside of the crown
1/4 yard of coordinating fabric for the inside of the crown
Some form of stiff stabilizer to make the crown stand up. I’ve used 1/4 yard of fusible fleece interfacing for this project, but I’ve also made them with regular quilt batting that I spray basted to one of the fabric layers (which is what I did for the crown I made this week). You can totally use felt or even card stock. Fabric alone won’t stand up tall and stately.
Thread
Sew-in Velcro (NOT the sticky stuff)
Scissors or a rotary cutter
A good ruler
Graph paper (optional, sometimes I wing it without a template)
A pencil and marker
Tape measure
I used to use graph paper to draw a template for the crowns, but I’ve stopped using that method. If you’re more comfortable with a template, I’ll put those directions at the bottom.
This is how I make this crown now, in 2017:
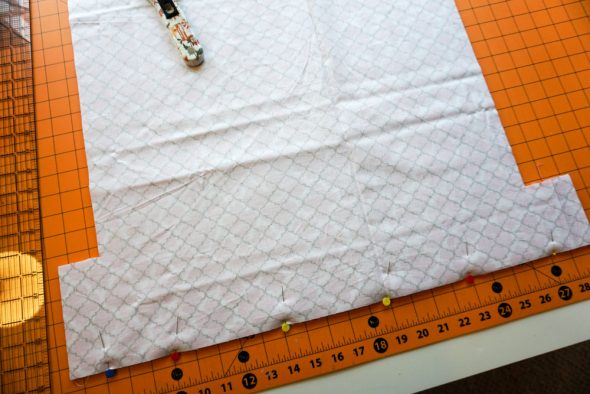
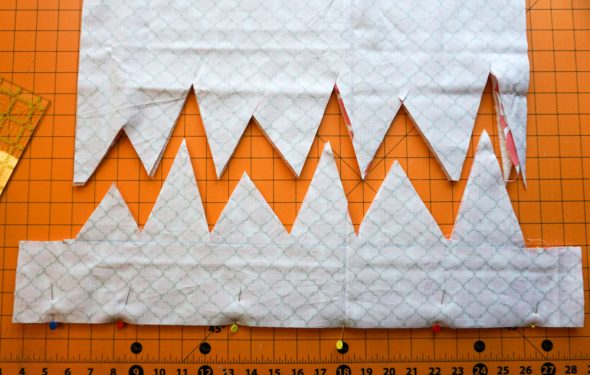
Measure your child’s head and then add 3.5″ for seam allowances and to give them some room to grow into it. My daughter’s head is currently about 21″, and I want this crown to be able to grow with her, and since I have a 24.5″ long ruler, that’s the width of the fabric pieces I cut.
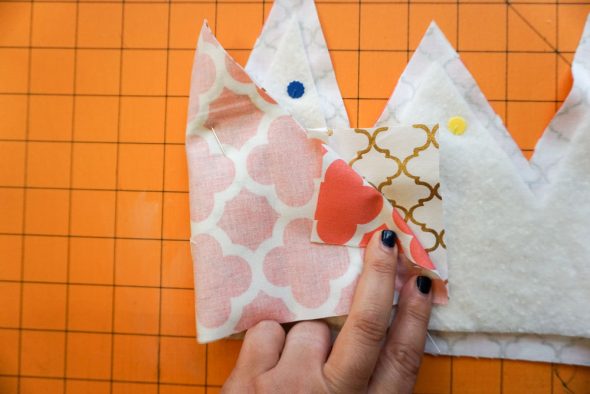
On your cutting mat, lay down your batting and then your inner and outer fabrics, right sides facing each other. Pin it, and then cut it down to a 24.5″ wide rectangle. I actually used half yard and big scrap pieces, so I let the height stay the full size of those pieces while I whittled away at it.
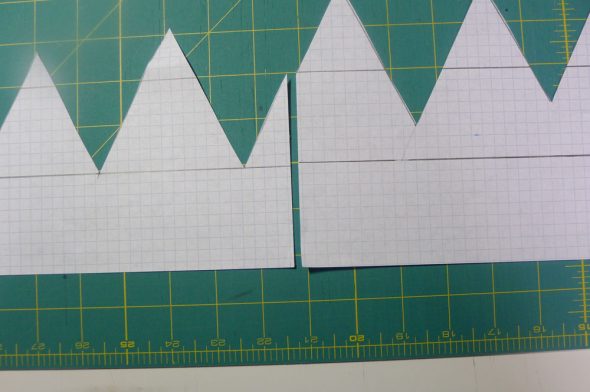
From each side, measure 3.5″ up, mark it, and then cut 2″ in, parallel to the bottom of the pieces. It will look like a jaunty top hat.
(Also, I messed up that left side initially and made it 5″ tall, but I went back and corrected it).
Use a chalk marker to draw a line across this new indented ridge, the brim of the top hat, from side to side.
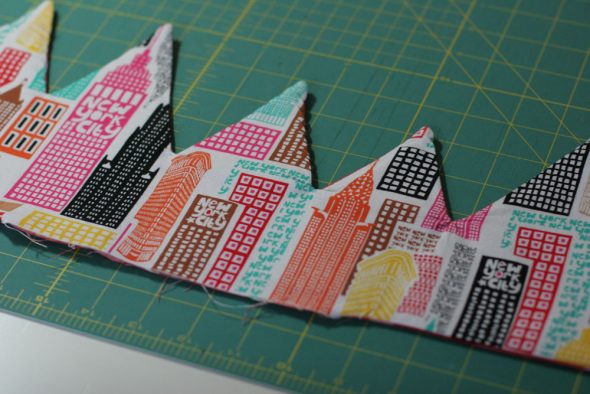
Once you have the jaunty top hat, use a smaller ruler to just go in and start cutting out peaks. I made these quite random and didn’t measure their height, but again I like a Where the Wild Things Are look. Just stop each peak roughly 1/2″ above the chalk line you drew, so the cuts don’t come all the way down to meet that line. I’ve tried it meeting the blue chalk line, but I think it makes the hat seem floppier. That 1/2″ of distance about the “brim” (as I’m calling it) worked for me.
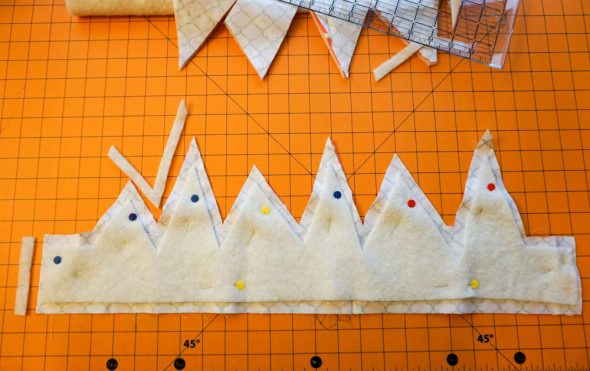
Now this is where you might find you like a template method better, but I don’t doing this. Unpin the batting layer from the crown sandwich, and use a ruler and a rotary cutter to remove 1/2″ off of every side, including between the peaks. You want it to be 1/2″ smaller than the fabric layers everywhere.
Once it’s done, use a spray glue or temporary spray basting glue to attach the batting to the wrong side of one of the fabric layers. If you’ve used fusible fleece, follow the directions and iron it onto the fabric. Make sure you’ve centered it so that 1/2″ is visible all around, and then pin the project together again. Pin the outer fabrics together so that the right sides face each other and the batting is on the outside of one fabric.
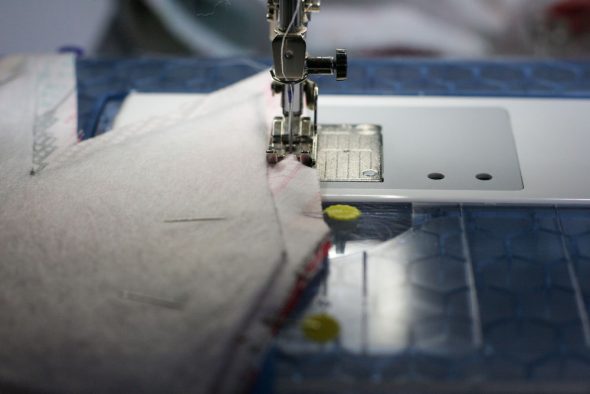
Sew all the way around the sides and the peaks of the crown using a 1/4″ seam. But leave most of the bottom edge open to turn the project inside out, only sewing a few inches in to the left and to the right.
Cut the tips off of all the points on the crown.
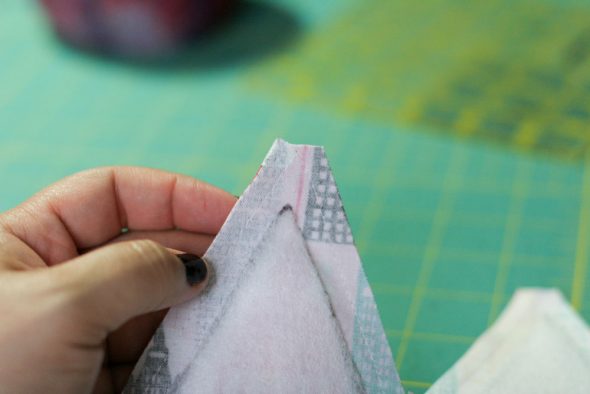
To make turning the project out easier, cut a notch into the space between peak, leaving about 1/8″-1/4″ from the seam. This just gives those crevices more flexibility when you turn them right side out.
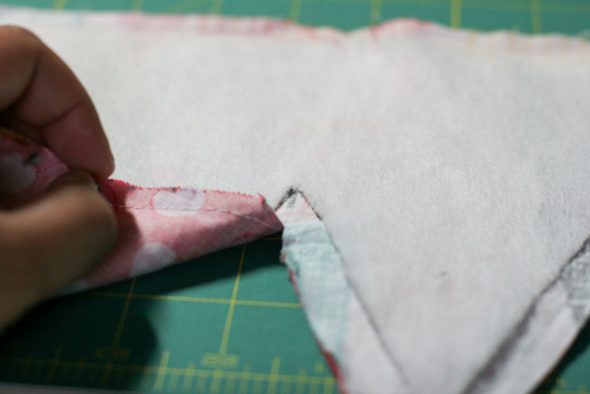
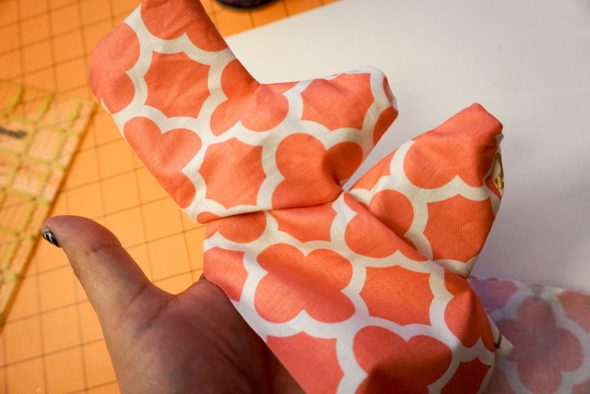
Turn the project right side out, using a knitting needle or chopstick to push all the points of the crown through.
Iron it flat. This is the OG crown, but you can see that the bottom is mostly still open.
Now you’re going to topstitch the crown and close up the bottom. Fold those open edges along the bottom in on themselves about 1/4″, and pin the whole opening. Then sew around the entire crown again, topstitching it about 1/8″=1/4″ from the edge. I make it closer to 1/8″ to make sure I actually close up the opening on the bottom.
If you started out with 24.5″ wide pieces for the crown, the sewn crown should now be 24″ wide.
Once the crown is closed, cut two sets of velcro strips 3″ wide. Attach both hook sides of the velcro (the fuzzy side) to the front of the crown on the right. Pin the strips about 1/2″ in from the side, in parallel lines, and sew around the perimeter of each piece to attach the velcro. Then attach the loop pieces of the velcro (the rough halves) to the back of the crown on its right side. When the crown is laid flat, there should be velcro on opposite ends of the crown, one in front and one in back.
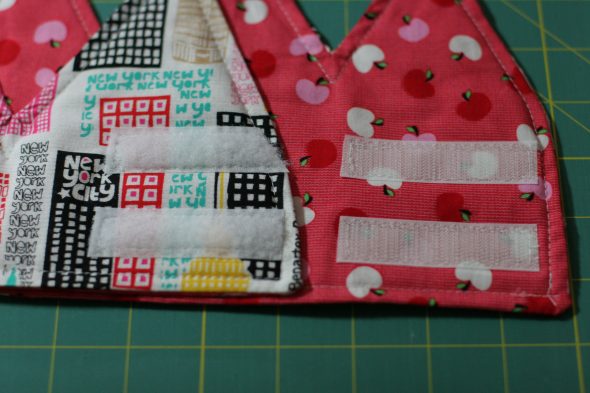
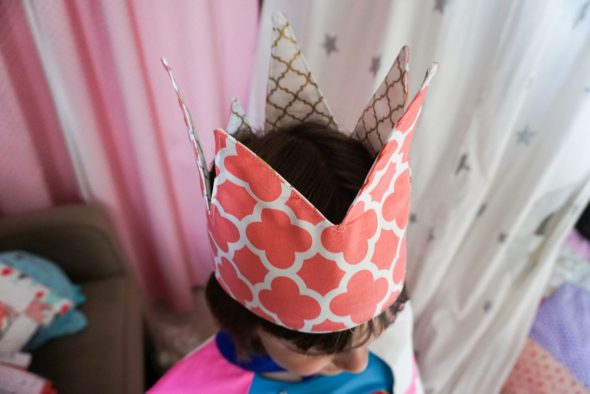
On the first version of this crown I made, above, the triangle peaks went straight to the edges. Now I make them with that top hat brim so the back looks a little more tidy.
This was the old back:
This is the way I make the backs now:
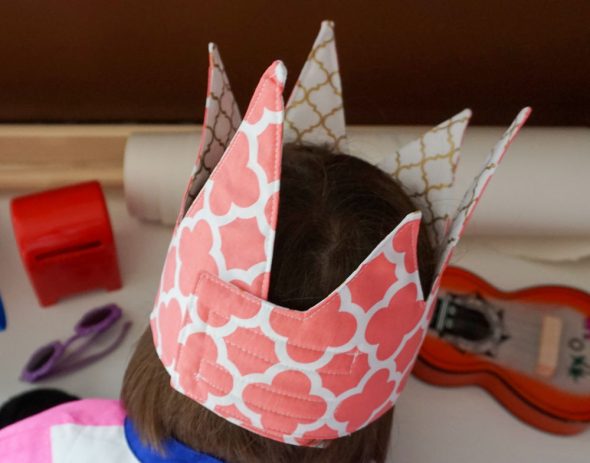
I just think it looks neater. And then you have a crown that’s adjustable and reversible! Put it on your benevolent leader.

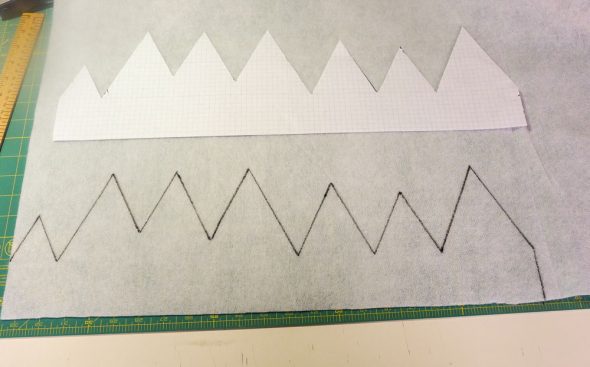
Now, if you really like the idea of a template to help with the peaks, here’s how I did that version:
Get a piece of graph paper. Draw a line across the middle, then divide the top half and bottom half again and draw two more lines.
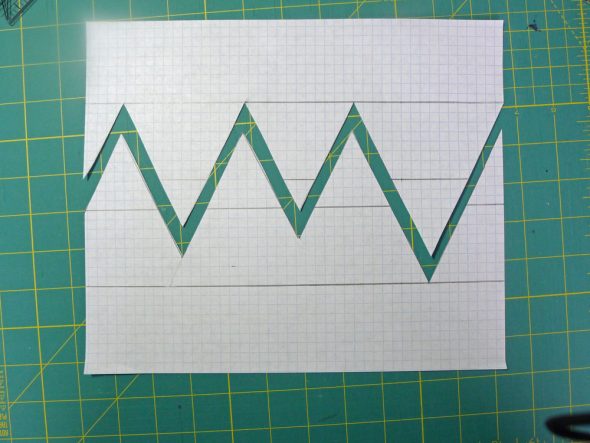
You divide the paper into 4 equal sections, basically, then use a ruler to draw the crown’s points so they don’t go beyond the lowest and highest lines you drew.
I like to use a piece of 8.5″ x 11″ graph paper for very small crowns, which will give you a 22″ wide crown template. You’ll lose about half an inch of this width in the final project, so you’d end up with a crown that’s about 21.5″ around. When you put the velcro on (we’ll get to that later), you’ll have a crown that would fit a head about 18″-21″ around when it’s all finished. This is a pretty good size for babies and toddlers, and if you like using a template but have an older child with a larger head, you can continue the template on another piece of graph paper to get to the circumference you need.
When I first made this I left the last point at the right edge as an unfinished triangle. So when I cut out my template and line up the two halves of the paper I have a nicely aligned edge to tape together.
Cut out your template and tape the two halves of the paper together to make a 22″ wide template.
Once you’ve assembled your template, trace it onto the fusible fleece or whatever stabilizer you decide to use ( the fusible stuff is nice because it stays where it’s supposed to when I’m assembling the crown, but now I tend to just spray baste it).
Cut out the stabilizer. Iron your outer fabric and then follow your interfacing directions to iron the interfacing to the wrong side of the crown’s outer fabric.
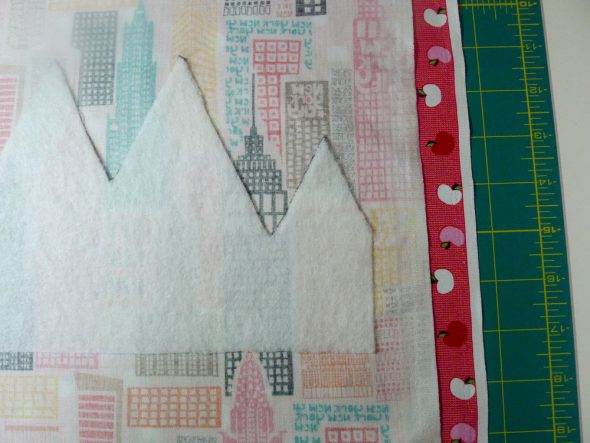
Iron your inner fabric and make a sandwich on your cutting surface. Put the inner fabric down first, right side up. Then put the outer fabric next, right side down (the two right sides will be facing each other). The stabilizer will be on top of the sandwich now, fused to the back of the outer fabric.
Measure 1/2″ out from all edges of the stabilizer and carefully cut through both layers of fabric along those edges. Again, trust me from experience, you will need that 1/2″ for seam allowance when you try to turn this right side out. Pin the seams as you cut to keep the fabric layers from shifting.
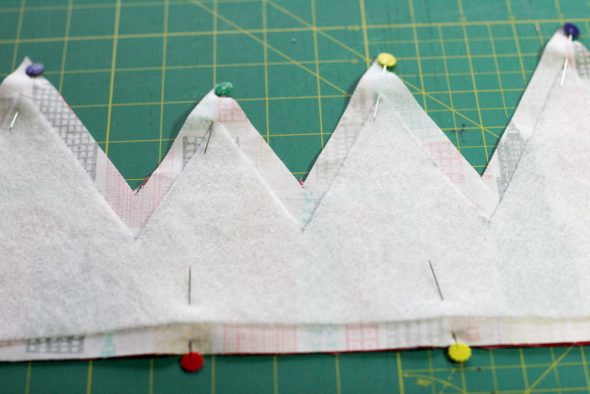
Sew 1/4″ seams along all sides of the crown, leaving a 6″-8″ opening at the bottom of the crown for turning (I actually left a side opening on my very first try making these—that is impossible to turn right side out).
From here, you follow the same directions as above. Snip off the tips of the crown’s points and any corners, being really careful not to cut into your stitches.
Cut notches into all of the spaces between your crown’s points. I made about three different versions of this crown before figuring out that this step was necessary to get your crown to lay flat. When you turn it right side out, you need that fabric in between the crown’s points to have some give so it will lay smooth.
Turn your crown right side out, using a knitting needle or skinny paintbrush handle to push out all the points as far as you can get them (without poking holes straight through the fabric, which I have done on many occasions).
Press your crown.
Fold the seams of your opened gap under and pin so they lay even and flat with the bottom of the crown. Top stitch over the whole crown with a 1/4″ seam.
Attach the velcro.
Attach crown to the head of your favorite benevolent ruler.
Here are some other crown tutorials that are pretty great, too:
Spoonflower Play Crown
Baby Toolkit DIY Play Crown
The Long Thread Dress Up Crown
Hungie Gungie Felt + Fabric Crown
We Wilsons Dress Up Crown Tutorial
Leave A Comment